This troubleshooting guide will help you if you encounter issues with your webcam when signing into your virtual appointment. Most often, the issue is caused when Corigan does not have permission to access to your camera or access to your camera is being blocked by another application/program. The following steps will help you troubleshoot your webcam to allow you to use Corigan for your virtual appointment. Scroll down to the type of device you are using for specific troubleshooting.
iPhones and iPads
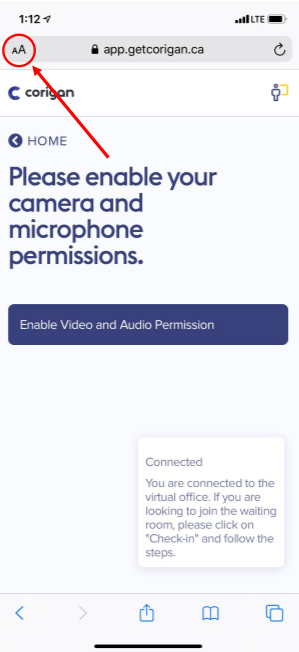
If using an iPhone or iPad, make sure you are using Safari as your web browser. Check to see if your camera is set to allow by clicking on the Aa symbol to the left of the website address.
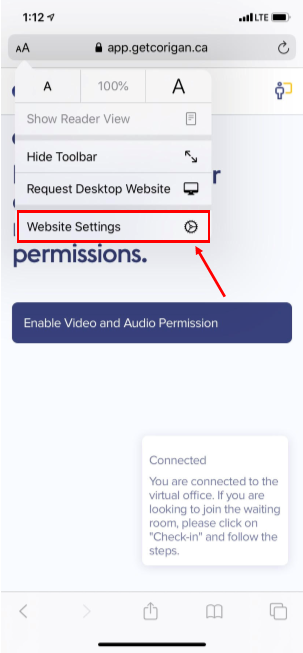
On the drop down window that appears click on site settings.
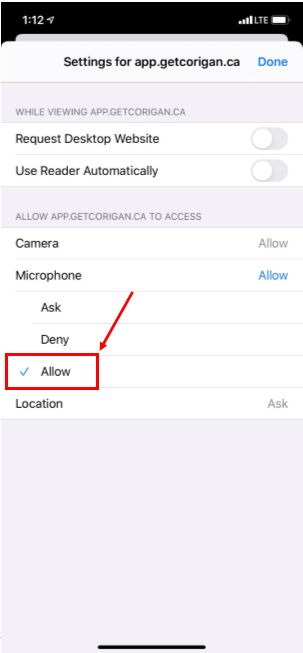
Click camera and make sure it is set to allow. If it is not set to allow change the setting, refresh the page, and check in again for your appointment.
Close all open apps by swiping up from the bottom of the screen and pressing close all. Open safari again and sign back into Corigan. If you do not know how to close all open apps, restart your device to do it automatically.
If after closing all apps it is still not working, restart your device and sign in again. If your browser is not blocking access then restarting your device should allow Corigan to access your camera.
Androids
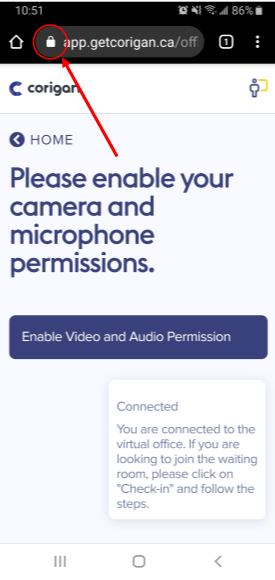
If using an Android, make sure you are using Google Chrome as your browser. Check to see if your camera is set to allow by clicking on the padlock symbol to the left of the website address.
A drop down window will open that has the websites permissions on it. Make sure to the right of both camera and microphone it says allow. If it doesn’t, change it to allow by clicking on camera and selecting allow. Refresh the page and sign back in for your appointment.
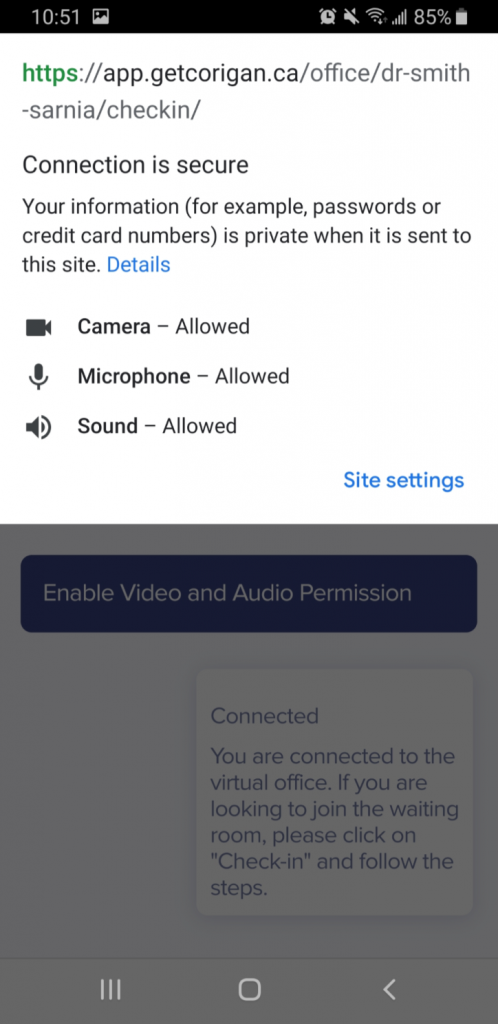
If your camera is still not working or you phone was set to allow, close all open apps. Swipe up from the bottom of the screen, press the home button twice, or press the button in the bottom left of the screen and press close all. Open Google Chrome again and sign back into Corigan. If you do not know how to close all open apps, restart your device to do it automatically.
If it is still not allowing access to your camera, go into site settings and reset the settings for Corigan. To do this click on the padlock symbol to the left of the address bar. At the bottom of the window that appears click on site settings and then click clear and reset.
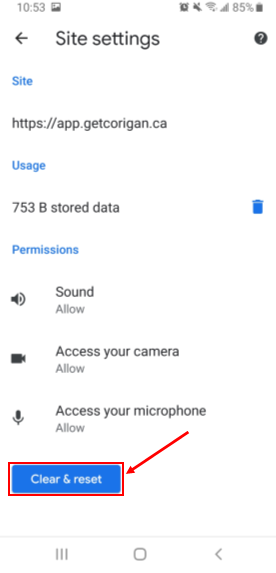
Refresh your page and go through the check in process again. Resetting the site settings will make your browser ask for permission to allow Corigan to use your webcam. Click allow to let Corigan have access to your camera.
Mac’s and PC’s
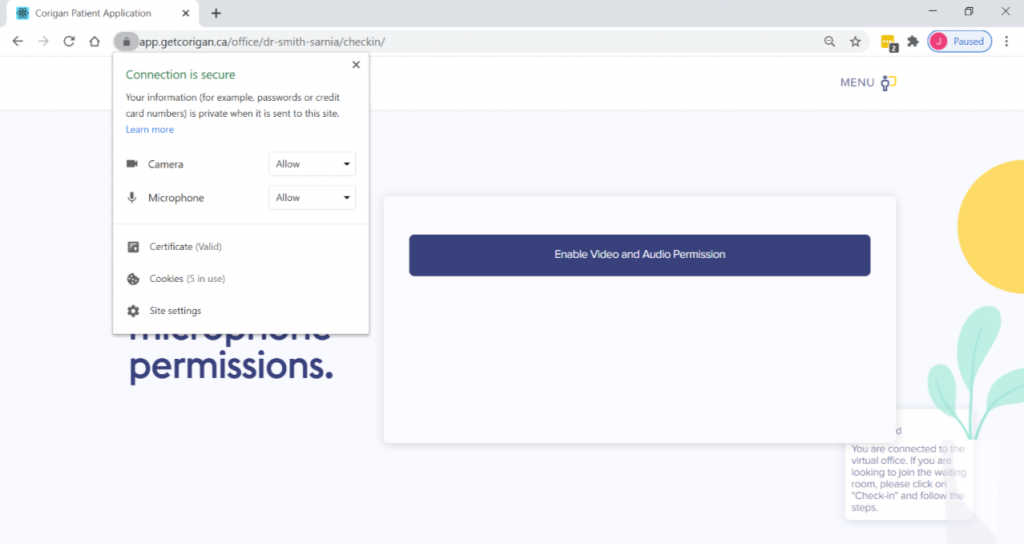
Use Google Chrome as your browser if using Corigan on a Mac or PC. Check to see if access to your microphone and camera is allowed by clicking on the padlock to the left of the address bar. You will see microphone and camera in the window that appears. To the right of them make sure it says allow. If it does not, change it to allow, refresh your page and check in for your appointment.
Test your webcam to see if it is functioning. Open the camera app on PC’s by searching in the start window at the bottom of the screen. Open facetime or photobooth on Mac’s by searching in finder. You should be able to see yourself on the screen. If you are unable to see yourself your webcam may not be properly set up. See the webcam setup guide for tips on how to set up your webcam.
If your webcam is functioning but Corigan is unable to access it, try restarting your computer then signing back into Corigan. Other programs may be using the camera and are stopping Corigan from gaining access. Restarting your computer will close everything and allow Corigan access.
If your camera still will not work reset the site settings on Google Chrome. Click on the padlock to the left of the address bar and then click site settings at the bottom of the window that appears. You will be taken to a settings page. Click reset permissions.
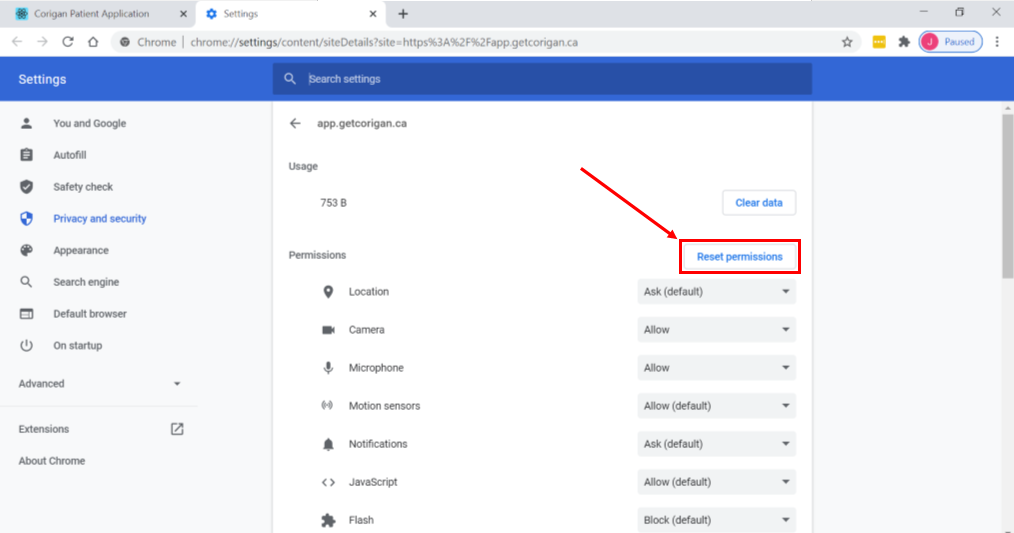
Go back to the Corigan tab in your browser, refresh the page and go through the check in process again. It will ask you to allow your microphone and camera. Make sure to click allow.


